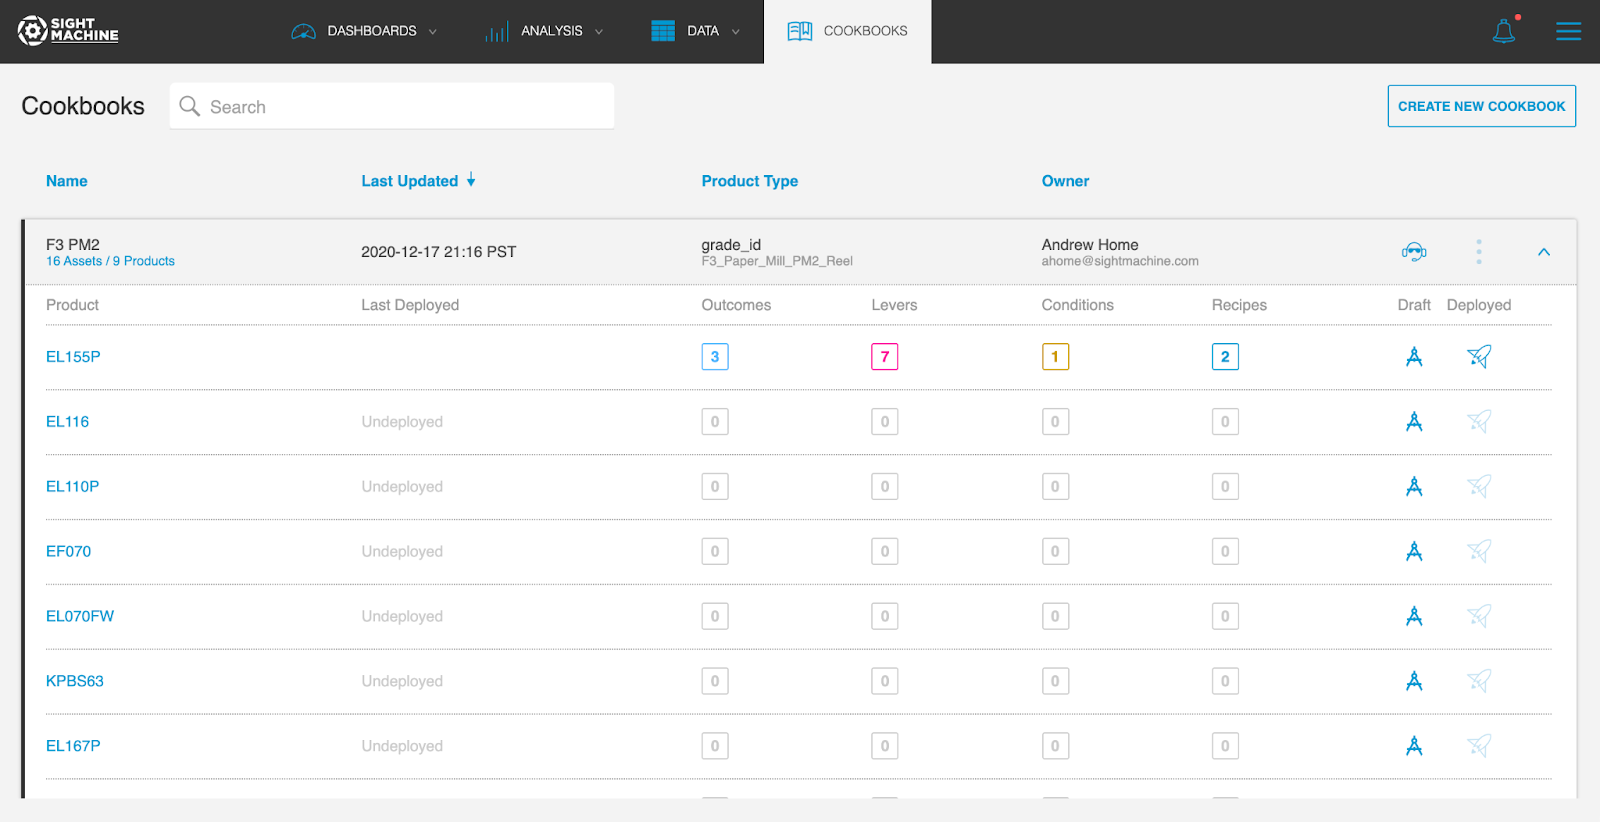
After you create your Cookbook, you can begin to build the Recipes for the products that are contained in that Cookbook.
To create Dynamic Recipes:
Access the Recipe Builder tool. Expand the Cookbook and select the target product.
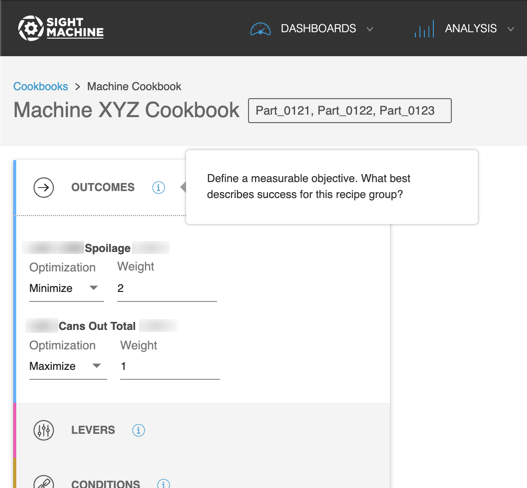
Select Outcomes. In the Outcomes section, select the data fields that represent the results that you want to achieve.
Outcomes can be results that you want to increase/maximize or decrease/minimize. You can also select a specific value of a continuous data field to target as an outcome to optimize for, where runs closest to that result will be scored highest.
Outcomes also contain a weighting. For outcomes that you care most about, provide more weighting. Weighing is relative so if you have one outcome with a weight of 1 and another with a weight of 4, the second outcome will have 4x the weight in scoring the Recipes’ runs.
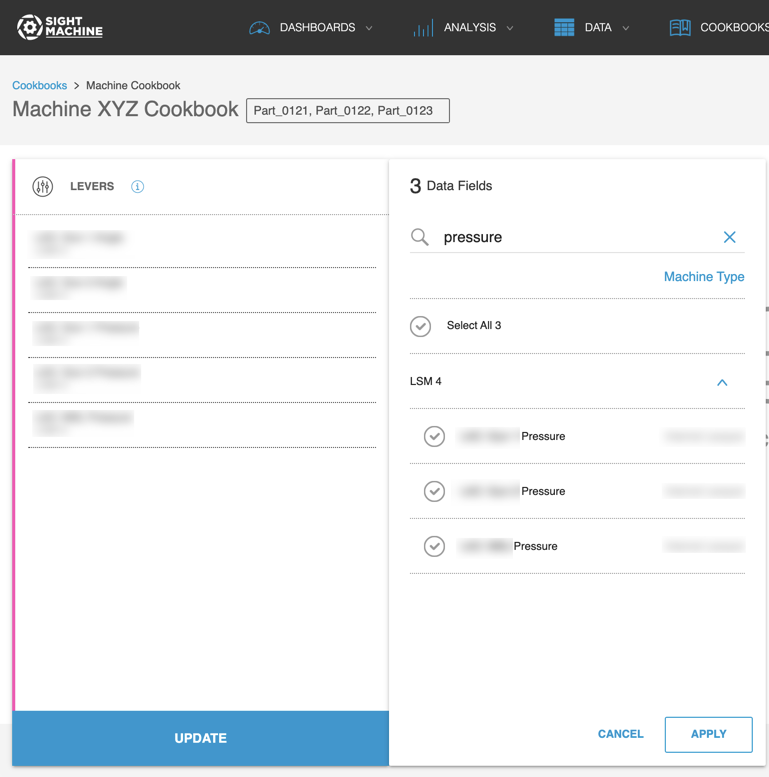
Set Levers. Levers are the parameters that you can control or that you want to monitor. Levers are recommended to operators in the Operator CoPilot application. For more information about settings in the Levers section, see Using the Operator CoPilot Application.

Tip:
You can also order the Levers within this panel to control the ranking displayed in CoPilot.Set Conditions. Conditions are the factors that you cannot control, such as which supplier’s material you are using or the result of an upstream process. Each unique combination of conditions that you identify in the Conditions section creates a Recipe.

When the condition field that you select has continuous data, you have the option to group the ranges of the condition.
Note:
This range configuration interface can appear in the Cookbook creation step as well, for Recipes that are defined based on continuous data vs. categorical data. The conditions and ranges that you configure create discrete groups of data that are clustered into runs and classified as part of a given Recipe.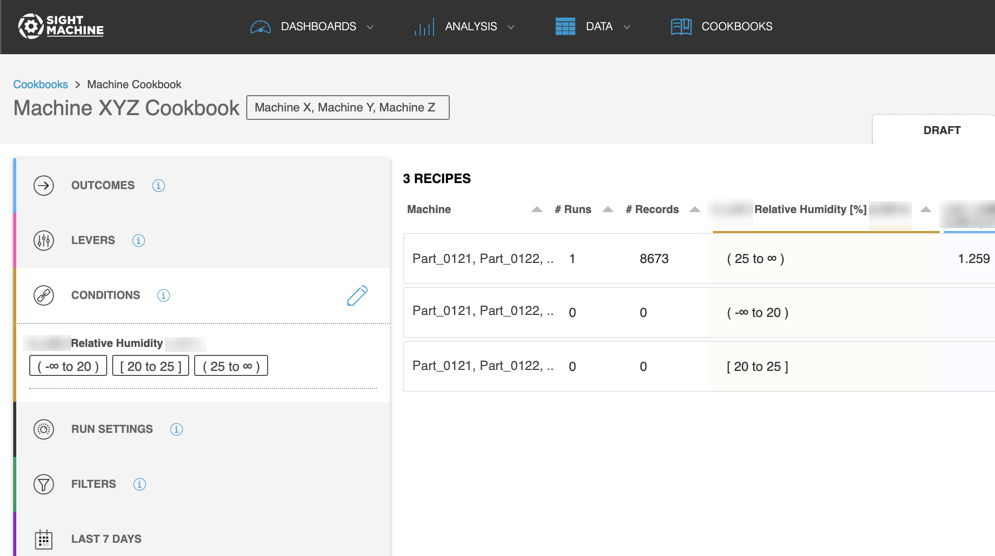
In the example above, the initial ranges selected do not offer useful segments to optimize, so the feedback to the Process Engineer here is to iterate in Draft mode. The Process Engineer can delete a Condition to try a different one, or test different range values. The Process Engineer can also add more ranges by selecting the plus (+) icon in the upper-right, until there is a strong representation of the different conditions likely to be encountered in the production process.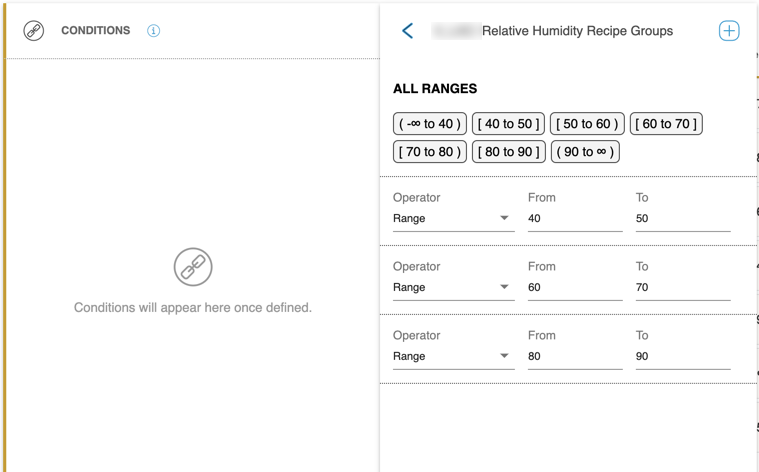
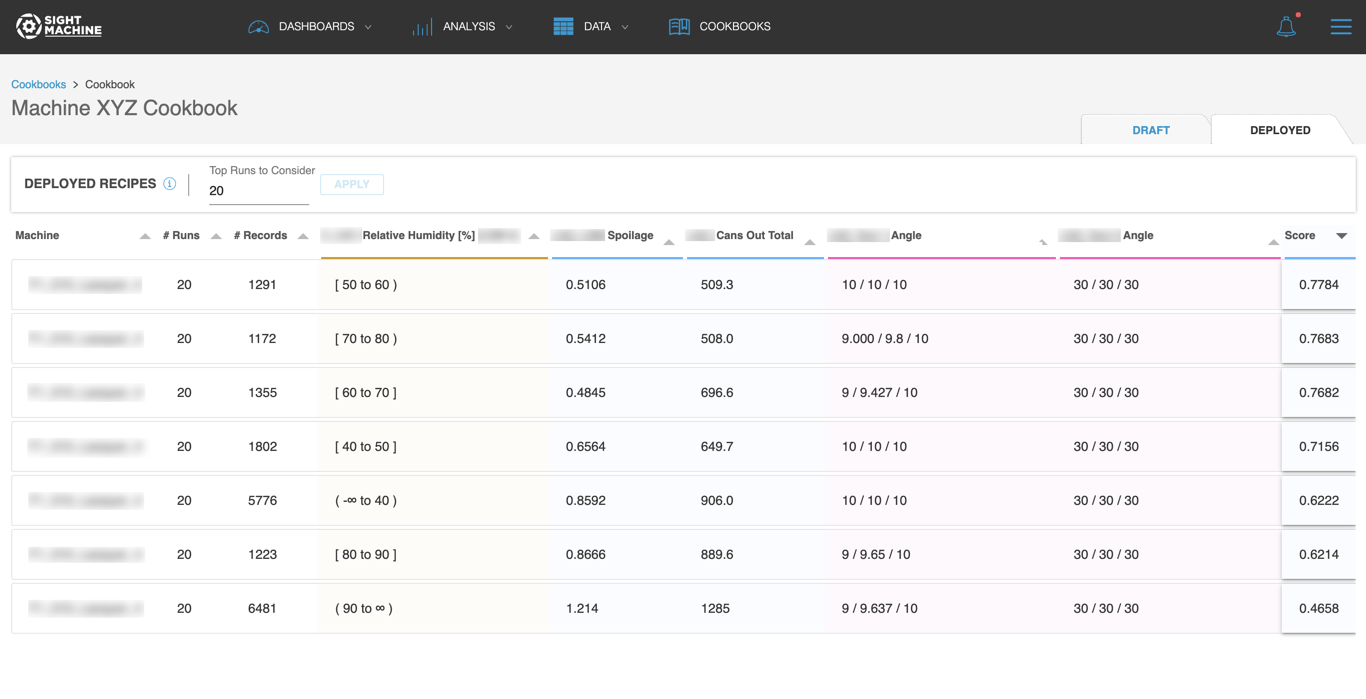
The following example illustrates how variations in humidity may be associated with different equipment operating values to achieve the best results moving forward, based on historical results scored against your target outcomes.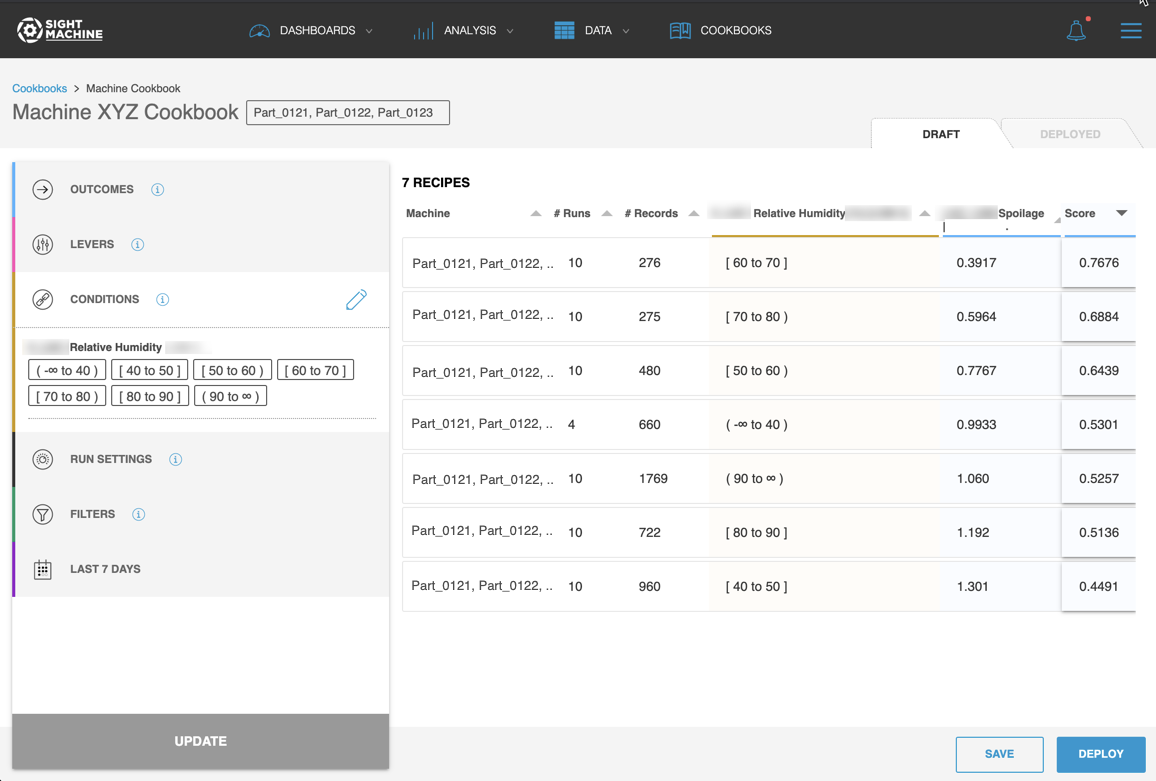
Add Run Settings. You can further refine and optimize calculations. At the top of the Run Settings section, do the following:
Better define the boundaries of a run.
Determine how many runs to consider in your calculation.
Decide which runs should not be considered because too short of a duration would not be a reliable benchmark.
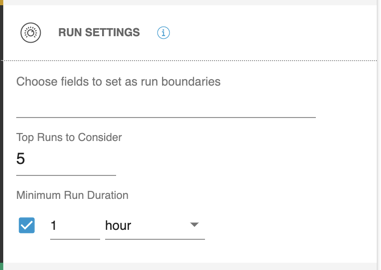
Select a run boundary field if you find this helpful. However, boundaries are currently limited to categorical values. A change in the value of a run boundary determines the start and end of each run.For example, if production is paused for shift changes, you may want to distinguish production before and after shift changes as different runs.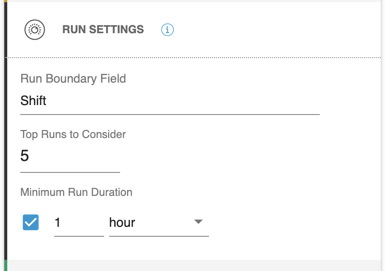
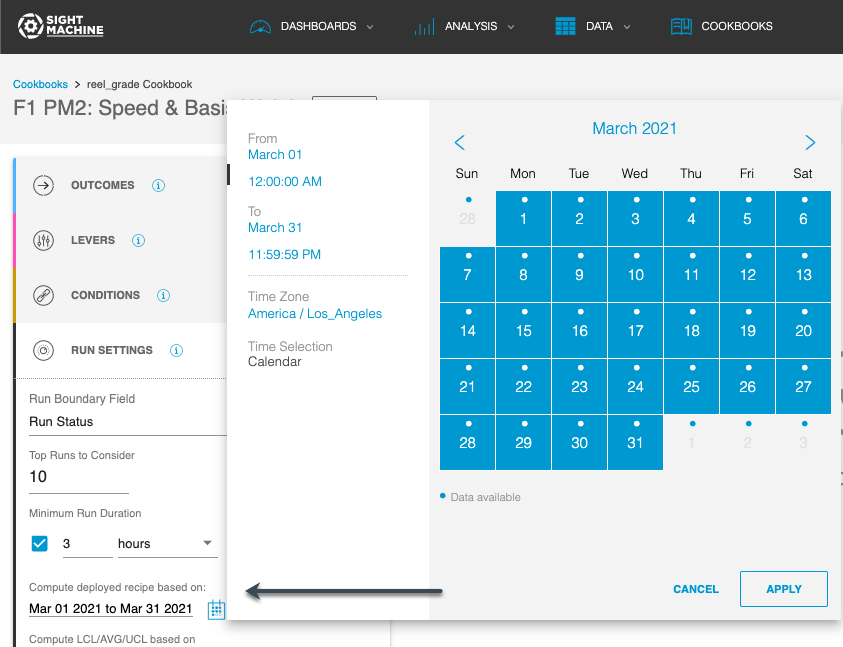
You can also control other important aspects of how recommendations are calculated. At the bottom of the Run Settings section, to use a custom deploy range configuration, use the picker to select the range of dates used in the computation, and then click Apply.
Determine your computation method. You have two options:
You can determine whether you want the setpoint values recommended based on the top runs considered to apply the same weight to each of those runs in computing the values.
You can weight the runs proportional to their duration. The Weighted Stats option gives longer runs a proportionally larger impact in calculating the recommended equipment values. Select either option from the Compute drop-down.

Add filters. Filters also offer more control to filter out data within a run.

Set time ranges. The time range is available in Draft mode only and helps you select small subsets of data to quickly verify your Recipe formula. After you deploy the Recipes, the Cookbook scans all available historical data (or the custom range that you defined in Run Settings), and finds the best runs for each Recipe to use, based on the operating conditions that were encountered.

Work with the Runs display table. To inspect the specific runs comprising the recommended setpoint values (which are based on the average, upper control limit, and lower control limit (2 sigma) of the Top Runs Considered), select the Recipe. This behavior is consistent in both Draft and Deployed modes. For example, consider the Recipes below:
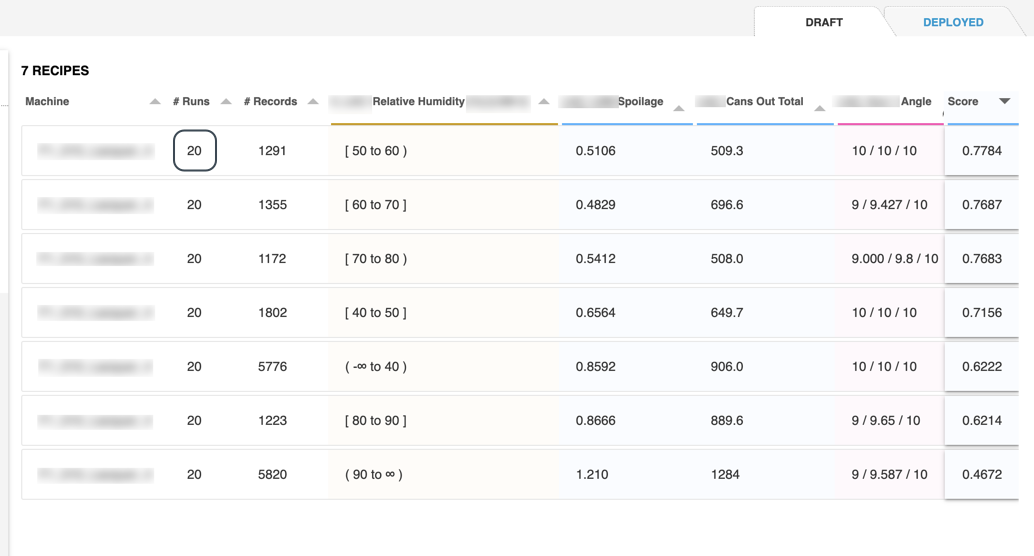
If you select the first row, you see a table of those specific runs: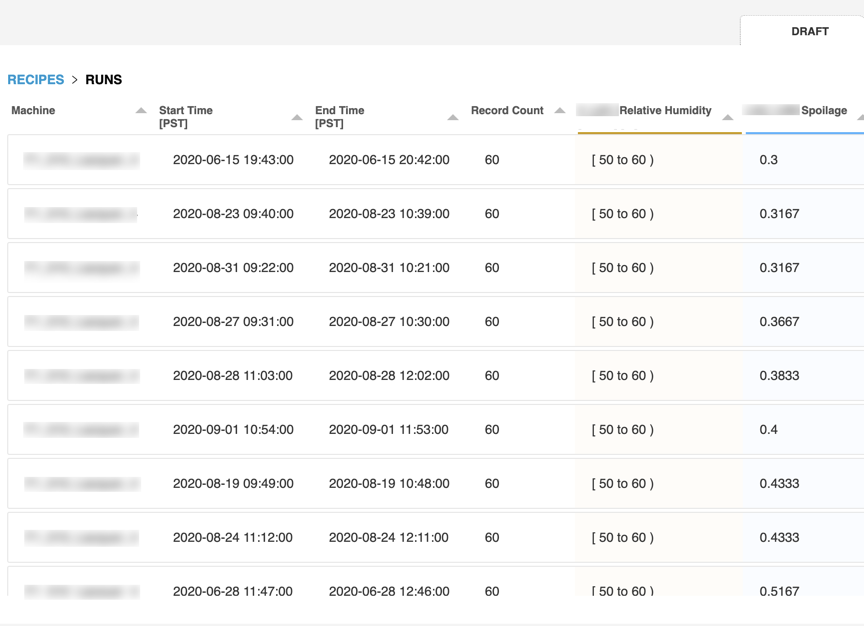
After you finish setting up Dynamic Recipes, you are ready to deploy them.
To deploy Dynamic Recipes:
Click Deploy. A status message appears while Sight Machine scans all the data and computes the recommended values. You can leave this page; your results will not be lost. Your results are returned to the Deployed tab when they finish computing.
